Editing Filter Categories
Every faculty, researcher, and graduate student list has a section at the top that lets you filter by category. Use the Web Editor to add, remove and edit filter categories and subcategories.
Step One: Find the Office
You'll need to be an office editor (i.e. staff or delegate) to be able to edit filters.
First, use your UT EID to log in to the Web Editor.
Go to your dashboard and click the eye button next to the office you want to edit. This will take you to a page where you can edit general information for that office.

This caption describes the image above.
Every faculty and graduate student list has a section at the top that lets you filter by category. Use the Web Editor to add, remove and edit filter categories and subcategories.

This caption describes the image above.
Step Two: Edit the Categories Section
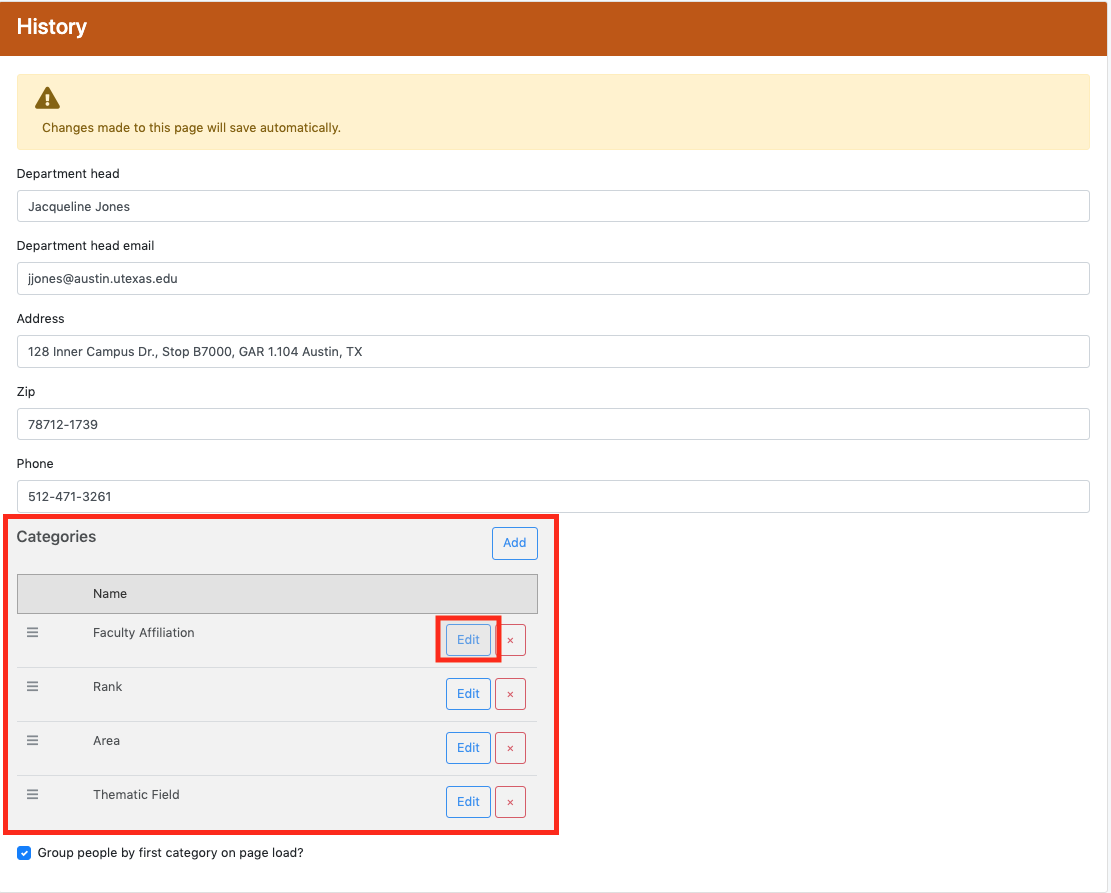
At the bottom of the page there will be a section called “Categories.” Each category (rank, fields, etc) will be added as a filter to the top of the faculty or graduate student page, with subcategories that you can select from a dropdown menu.
Click the Add button to create a new filter category; click the red ‘X’ button to delete a filter category.
Click and drag the three horizontal bars on the left to reorder the categories.
Click the Edit button to edit an existing category and its subcategories. A new window will appear; in it you can change the name of the filter category, choose which list (faculty, graduate, or both) it will be applied to, and edit the subcategories (called “items”).
Each subcategory has a name and a header. The name will be displayed in the dropdown menu; the header will be displayed at the top of each group in the list.
All of the changes you make on this page will be saved automatically.
Note: To add or remove faculty/graduate students from a category, you'll have to update each profile individually. Learn how to change the categories of a user.

This caption describes the image above.

This caption describes the image above.

This caption describes the image above.
